
Smart lights are one of the easiest and most affordable upgrades you can make to transform your home. From voice-activated bulbs to motion-sensor hall lights, these gadgets save energy, add convenience, and improve your lifestyle. Best of all, you don’t need to hire an electrician to get started.
In this complete guide, we’ll cover everything you need to know about installing smart lights yourself — safely, affordably, and without complicated wiring.
Why Choose Smart Lights?
Before diving into installation, let’s look at the benefits:
- No electrician required – Most smart bulbs and plugs are plug-and-play.
- Save money – LED smart bulbs consume up to 80% less energy than incandescent.
- Easy automation – Control lights with schedules, timers, or sensors.
- Voice control – Use Alexa, Google Assistant, or Siri to manage your home.
- Improved security – Lights can mimic your presence when you’re away.
Curious how these savings add up? Check our article on How Smart Plugs Reduce Your Energy Bills.
Step 1: Choose the Right Type of Smart Lighting
Not all smart lighting products are the same. Here are your main options:
1. Smart Bulbs
- Screw directly into existing light sockets.
- Controlled via app, voice, or smart home hubs.
- Available in white, tunable, or full-color.
- Great for renters — no permanent wiring changes.
2. Smart Light Strips
- Flexible LED strips for under cabinets, TVs, and desks.
- Peel-and-stick adhesive, powered by outlet.
- Perfect for accent lighting.
3. Smart Plugs + Regular Lamps
- Turn any lamp into a smart lamp.
- Ideal for floor and table lamps.
- Add scheduling and remote control instantly.
4. Smart Switches & Dimmers
- Replace your traditional wall switch.
- Requires minimal wiring knowledge.
- More advanced than bulbs or plugs.
For full-home automation ideas, see How to Automate Your Home in One Weekend.
Step 2: Prepare Your Setup
Before installing, do a quick checklist:
- Wi-Fi coverage – Most smart bulbs use 2.4 GHz Wi-Fi. Make sure your router covers all rooms.
- Smart home ecosystem – Decide whether you’ll use Alexa, Google Home, or Apple HomeKit.
- Download apps – Install the manufacturer’s app (e.g., Philips Hue, TP-Link Kasa, Govee, Meross).
- Test bulbs – Make sure the light socket works with a standard bulb before installing smart ones.
Step 3: Install Smart Bulbs (No Tools Needed)
This is the easiest option for beginners.
- Turn off the light switch.
- Unscrew the old bulb.
- Screw in the smart bulb.
- Turn the switch back on.
- Open the companion app and follow pairing instructions.
Pro tips:
- Group bulbs by room in the app for easier control.
- Enable “power restore behavior” so lights return to your preferred setting after a power outage.
Step 4: Set Up Smart Plugs with Lamps
Smart plugs are an effortless way to get started if you don’t want to replace bulbs.
- Plug the smart plug into the wall outlet.
- Connect your lamp or appliance.
- Pair the plug with the app.
- Name it (e.g., “Living Room Lamp”).
- Create schedules (e.g., turn on at sunset, off at midnight).
For more cost-cutting tips, read Top 10 Energy-Efficient Appliances for 2025.
Step 5: Add Smart Switches (Optional, Basic Wiring Required)
If you want full control over ceiling fixtures and multiple bulbs, smart switches are your best bet. While they do require handling wires, many models are designed for DIY installation with simple step-by-step instructions.
Basic process:
- Turn off the power at the breaker (safety first!).
- Remove the existing wall plate and switch.
- Connect the smart switch wires to the corresponding wires (line, load, ground, neutral).
- Screw the switch back into the wall.
- Restore power and connect via app.
Safety tip: If you’re unsure, stick to bulbs and plugs. But most modern switches are safe for beginners who follow instructions carefully.
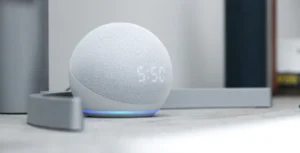
Step 6: Connect to Voice Assistants
Smart lights shine when combined with voice control like Alexa or Google Home. Here’s how:
- Alexa: Enable the skill in the Alexa app → Discover devices → Control with “Alexa, turn on the kitchen lights.”
- Google Home: Add device in Google Home app → Link account → Control with “Hey Google, dim the lights.”
- Apple Home/Siri: Use Home app on iOS → Scan HomeKit QR code → Control with “Hey Siri, lights off.”
Want to integrate lights with other gadgets? See How to Save Energy with Smart Home Technology.
Step 7: Automate with Schedules and Scenes
Once your lights are set up, automation takes the experience to the next level.
- Morning routine: Lights gradually brighten to wake you up naturally.
- Away mode: Randomized schedules mimic someone being home.
- Movie night scene: One command dims the living room lights and turns on LED strips.
- Vacation mode: Lights follow a pre-set pattern to save energy and boost security.
Step 8: Use Sensors for Smarter Lighting
Motion and ambient light sensors make smart lighting even more efficient.
- Hallways & Bathrooms: Motion sensors turn lights on automatically.
- Bedrooms: Lights stay dim until needed.
- Outdoors: Floodlights activate only when motion is detected.
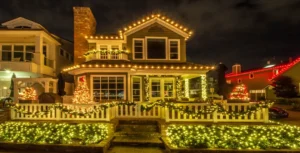
These small upgrades can drastically reduce wasted electricity. If you interested how to decorate your home for Christmas, read my article Outdoor Smart Lighting Ideas to Transform Your Yard for Christmas
Common Problems and Fixes
Problem 1: Bulb won’t connect to Wi-Fi
- Make sure you’re using 2.4 GHz (not 5 GHz).
- Reset the bulb (usually by turning it on/off 3–5 times).
Problem 2: Lights don’t respond to voice commands
- Ensure the device is named clearly in the app (e.g., “Bedroom Lamp” instead of “Device 1”).
Problem 3: Flickering bulbs
- Check compatibility with your switch. Some dimmers are not compatible with smart bulbs.
How Much Money Can You Save?
Smart lights use less electricity and eliminate waste. Here’s a quick estimate:
| Setup Type | Estimated Annual Savings |
| Smart Bulbs | $30–$50 per room |
| Smart Plugs | $20–$40 per lamp |
| Motion Sensors | $50–$75 in high-traffic areas |
| Full Automation | $200+ across the home |
Combined with smart plugs and efficient appliances, savings multiply — and your gadgets pay for themselves.
FAQs
Do I need a hub for smart lights?
Not always. Many bulbs connect directly to Wi-Fi. Some brands (like Philips Hue) use a hub for more features.
Can renters install smart lights?
Yes! Smart bulbs and plugs require no permanent changes, making them perfect for apartments.
Are smart switches safe to install?
Yes, if you follow instructions and turn off the power at the breaker. If you’re uncomfortable, stick to bulbs and plugs.
Final Thoughts
Installing smart lights doesn’t have to be complicated — or expensive. With just a few bulbs, plugs, or switches, you can upgrade your home lighting without calling an electrician. Start small, experiment with automation, and expand as you go.
Smart lighting not only makes life more convenient but also saves energy and money, proving that the investment pays for itself.
Some of the links at our site are affiliate links; we may earn a small commission if you buy through these, at no extra cost to you.


